Construindo um Termômetro
Material Experimental Disponibilizado:
Confira com a listagem e a foto a seguir, o material que você recebeu:
- Termoscópio
- Uma base de alumínio
- Uma haste metálica com rosca
- Um parafuso borboleta com arruela
- Uma presilha
- Um copo
- Gelo — a ser distribuído
- Fita crepe — a ser distribuída
- Caneta hidrográfica
- Elástico cortado
- Sal
Procedimentos Experimentais
Para tentar entender a natureza de forma mais exata, a Física precisa de medidas quantitativas. Neste experimento iremos construir um termômetro, ou seja, um dispositivo capaz de quantificar a sensação térmica (noção subjetiva de frio e calor).
1. Com a caneta hidrográfica marque no termoscópio a altura do líquido referente à temperatura ambiente como mostra a figura abaixo. Atenção, ao fazer esse procedimento segure o termoscópio pela parte superior (região sem o líquido).
2. Segure o termoscópio pelo bulbo, com a ponta dos dedos, até que o equilíbrio térmico seja alcançado (o líquido pare de subir) e em seguida use a caneta hidrográfica para marcar a nova altura do líquido. Veja figura abaixo.
3. A seguir fixe a haste metálica na base com a porca borboleta como mostra a figura abaixo.
4. Fixe a presilha na haste e em seguida utilize-a para prender o termoscópio. Nesse procedimento utilize o elástico para que o termoscópio fique devidamente fixado; apenas um nó é suficiente. Por fim, faça com que o termoscópio fique dentro do copo como mostrado a seguir.
5. Insira o gelo no copo e adicione um pouco de água. Quando o gelo começar a fundir (derreter) marque no termoscópio, com a caneta hidrográfica, a altura do líquido de acordo com a figura. Em seguida jogue o sal (à metade da quantidade fornecida) dentro do copo, observe o termoscópio e faça o quarto e último traço, quando tiver o equilíbrio térmico.
6. Coloque o termoscópio ao lado da régua abaixo, com o bulbo voltado para baixo, fazendo o traço correspondente à temperatura de liquefação do gelo corresponder ao valor zero da régua. Fixe, então, o termoscópio nesta posição, na folha de papel, com a fita crepe. Em seguida, preencha a tabela Registro de Dados Experimentais. Para preencher essa tabela escolha como primeiro valor o primeiro traço no termoscópio, de baixo para cima; assim, o primeiro valor deve ser negativo e o zero deve corresponder ao segundo traço. Para facilitar seu trabalho, esses valores já estão indicados na tabela. Registre então na tabela os outros valores.
Registro de Dados Experimentais I
| Traço de baixo para cima | Distância (unidades genéricas) |
|---|---|
| 1º | −0,5 |
| 2º | 0,0 |
| 3º | |
| 4º |
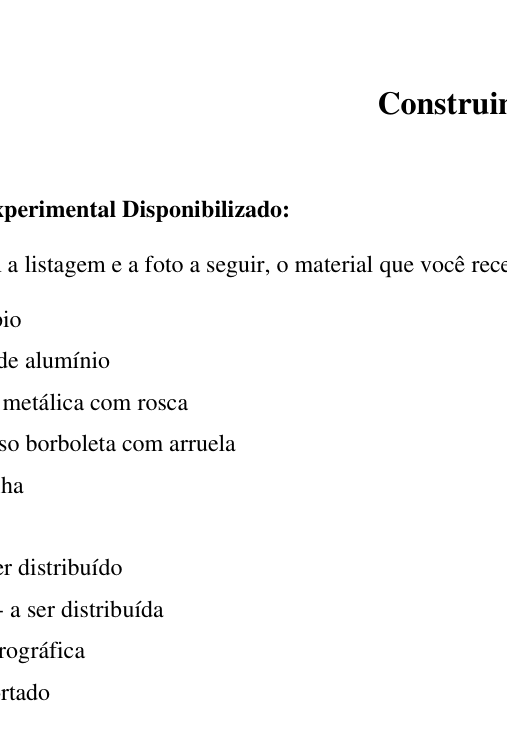 Experimental material photo: thermoscope and apparatus
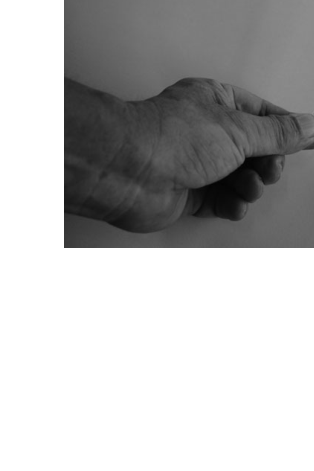 Thermoscope held by bulb, liquid rising
 Metal stand with base and butterfly screw
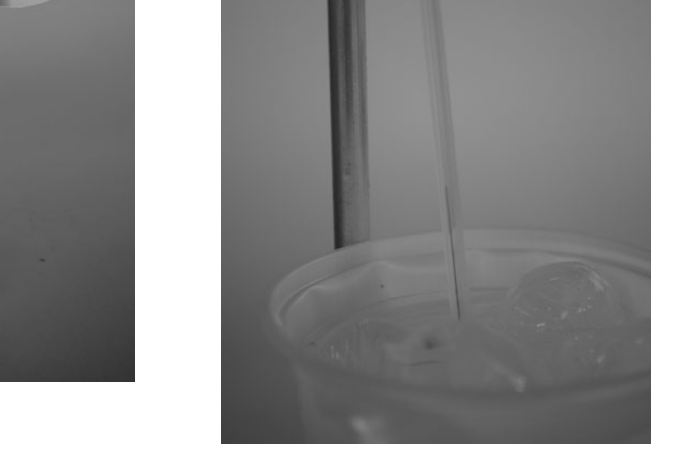 Ice and salt in cup with thermoscope fixed
 Ruler scale for thermoscope calibration
Topic: Thermodynamics, Kinetic Theory Metodi: Experimental Data Analysis, Physical Modeling, Dimensional Analysis Competenze: Experimental Data Analysis, Measurement & Instrumentation Objects: — Fonte: Testo (PDF) — p.2
Construendo un termometro
**Materiale sperimentale disponibile: **
Con la seguente lista e la foto, controlla il materiale che hai ricevuto:
- Termoscopio
- Una base di alluminio
- Una canna metallica con una retta
- Un perforazione per la farfalla con la ruola
- Una trappola
- Un bicchiere
- Ghiaccio da distribuire
- Fita crepe da distribuire
- Penna idrografica
- Elastico tagliato
- Sal
Procedimenti sperimentali
Per cercare di capire la natura in modo più preciso, la fisica ha bisogno di misure quantitative. In questo esperimento costruiremo un termometro, cioè un dispositivo in grado di quantificare la sensazione termica (nozione soggettiva di calore e freddo).
1. Con la penna idrografica segna sul termoscopo la altezza del liquido relativa alla temperatura ambiente come mostrato nella figura seguente. Attenzione, quando si fa questa procedura, segui il termoscopo per la parte superiore (regione senza liquido).
2. Segui il termoscopo con il bulbo, con la punta delle dita, fino a che il calore non sia più in equilibrio (il liquido smette di salire) e poi usa la penna idrografica per segnare la nuova altezza del liquido. Vedi la figura qui sotto.
La striscia metallica è quindi fissata alla base con il porco motone come mostrato nella figura seguente.
**4.**Fissa la presa sul bastone e poi la usi per attaccare il termoscopo. In questo procedimento, utilizzare il fascio per fissare il termoscopo in modo adeguato; basta un nodo. Infine, inserisci il termoscopo nel bicchiere come mostrato di seguito.
Messa il ghiaccio nel bicchiere e aggiungi un po’ d’acqua. Quando il ghiaccio inizia a fondere, segna con la penna idrografica sulla termoscopia l’altezza del liquido secondo la figura. Poi getta il sale (alla metà della quantità fornita) dentro il bicchiere, osserva il termoscopo e fai il quarto e ultimo tratto, quando hai il calore di equilibrio.
6. Metti il termoscopo accanto alla riga sotto, con il bulbo rivolto verso il basso, facendo corrispondere il tracciato corrispondente alla temperatura di liquefazione del ghiaccio al valore zero della riga. Quindi, fissate il termoscopo in questa posizione, sulla foglia di carta, con la nastro crepe. In seguito, compila la tabella Registro dei dati sperimentali. Per compilare questa tabella scegli il primo tratto del termoscopo come primo valore, da basso verso l’alto; quindi il primo valore deve essere negativo e lo zero deve corrispondere al secondo tratto. Per facilitare il vostro lavoro, questi valori sono già indicati nella tabella. Rendi quindi registrati gli altri valori nella tabella.
Registro dei dati sperimentali I
Tracciare da sotto verso l’alto Distanza |---|---| | 1º | −0,5 | | 2º | 0,0 | | 3º | | | 4º | |
*Termoscope e apparecchiature
Thermoscope held by bulb, liquid rising
Metal stand with base and butterfly screw
Ice and salt in cup with thermoscope fixed
Ruler scale for thermoscope calibration
Topic: Thermodynamics, Kinetic Theory Metodi: Experimental Data Analysis, Physical Modeling, Dimensional Analysis Competenze: Experimental Data Analysis, Measurement & Instrumentation Objects: — Fonte: Testo (PDF) — p.2
The manufacturer of the thermometer
The following information is provided by the Technical Service:
Check the following list and photo of the material you received:
- The thermoscope .
- A base of aluminum
- A metal rod with a thread
- A butterfly screw with a shell
- A trap
- A glass .
- Ice to be distributed
- Cracked Fita to be distributed
- Water pen
- Cut-off rubber
- Salt
The following information is provided by the Technical Service:
To try to understand nature more accurately, physics needs quantitative measurements. In this experiment, we’re going to build a thermometer, a device that can quantify the thermal sensation (subjective notion of cold and heat).
With the hydrographic pen, mark the height of the liquid relative to ambient temperature in the thermoscope as shown below. Careful, when doing this, hold the thermoscope upwards (liquid-free region).
2. Hold the thermoscope by the bulb with the tip of your fingers until thermal balance is reached (liquid stops rising) and then use the water pen to mark the new height of the liquid. See the figure below.
MSK1/> 3.** Next, fix the metal rod at the base with the butterfly pig as shown in the figure below.
4. Fix the handle on the stem and then use it to attach the thermoscope. In this procedure, use the elastic to ensure that the thermoscope is properly fixed; only one knot is sufficient. Finally, place the thermoscope inside the glass as shown below.
5. Put ice in the glass and add some water. When the ice starts to melt, mark the height of the liquid in the thermoscope with the water pen. Then pour the salt (half the amount supplied) into the glass, observe the thermoscope, and make the fourth and final stroke when the thermal balance is reached.
Place the thermoscope next to the bottom line with the bulb facing down, making the line corresponding to the ice liquefaction temperature correspond to the zero value of the line. Then fix the thermoscope in this position on the sheet of paper with the crepe tape. The following table is inserted in the table Experimental Data Registry. To fill this table, choose the first line in the thermoscope as the first value, from bottom to top; thus, the first value must be negative and zero must correspond to the second line. To facilitate your work, these values are already shown in the table. Then record the other values in the table.
The following information is provided by the Commission:
♪ I’m pulling down to the top ♪ |---|---| | 1º | −0,5 | | 2º | 0,0 | | 3º | | | 4º | |
The following information is provided by the Commission on the basis of the information provided by the Member States:
Thermoscope held by bulb, liquid rising
*Metal stand with base and butterfly screw *
Ice and salt in cup with thermoscope fixed
The following table shows the results of the tests:
Topic: Thermodynamics, Kinetic Theory Metodi: Experimental Data Analysis, Physical Modeling, Dimensional Analysis Competenze: Experimental Data Analysis, Measurement & Instrumentation Objects: — Fonte: Testo (PDF) — p.2